


📷 城市混合Shader
提示词
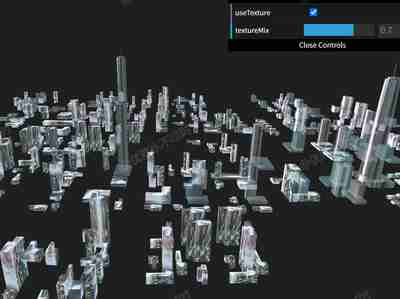
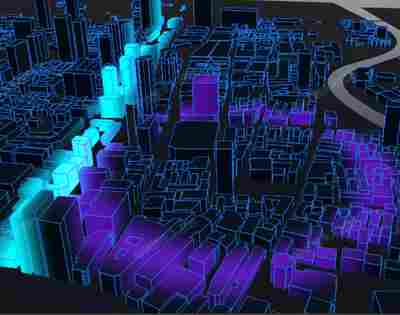
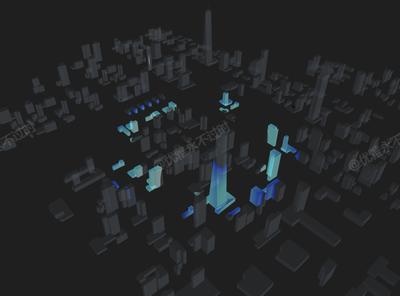
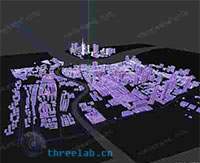
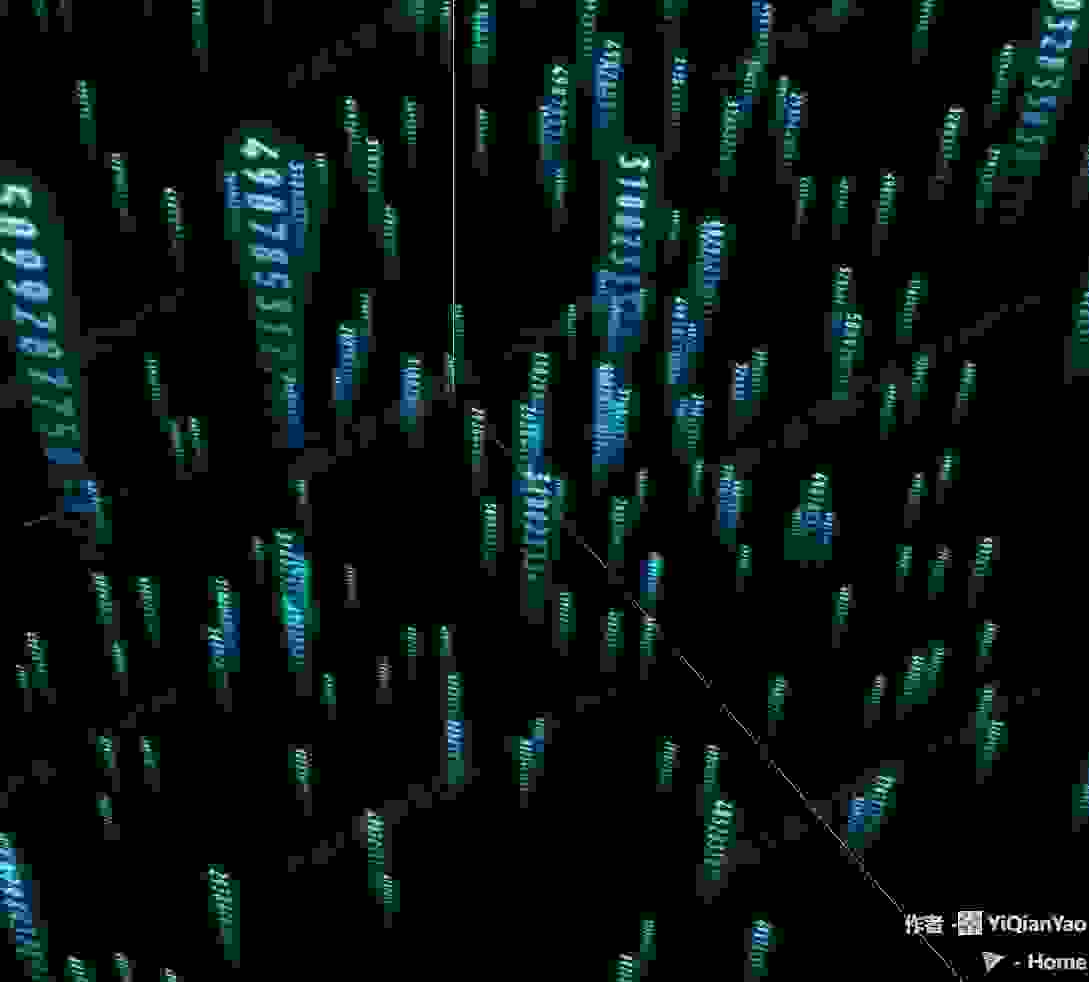
使用Three.js加载城市FBX模型,实现混合着色器效果,结合动态颜色和纹理混合创建赛博朋克风格的城市可视化。
效果拆解
| 效果 | 实现方式 |
|---|---|
| 城市模型加载 | 使用FBXLoader加载城市模型 |
| 混合着色器 | 自定义着色器实现动态颜色混合 |
| 星空背景 | 使用粒子系统创建星空背景 |
| 纹理混合 | 将着色器效果与原有纹理混合 |
| GUI控制 | 使用lil-gui控制着色器参数 |
| 动画效果 | 实现着色器的动态变化效果 |
核心技术点
1. 城市混合着色器
JAVASCRIPT
1
2
3
4
5
6
7
8
9
10
11
12
13
14
15
16
17
18
19
20
21
22
23
24
25
26
27
28
29
30
31
32
33
34
35
36
37
38
39
40
41
42
43
44
45
46
47
48
49
50
51
52
53
54
55
56
57
58
59
60
61
62
63
64
65
66
67
68
69
70
71
72
73
74
75
76
77
78
79
80
81
82
83
84
85
86
87
function modelBlendShader(model){
  let materials = [];
  model.traverse((c) => c.isMesh && materials.push(c.material));
  materials = [...new Set(materials)];

  const params = {
    intensity: 1.2,
    colorScale: 1.5,
    animationSpeed: 0.8,
    baseColor: "#6edbe8",
    useTexture: true,
    textureMix: 0.7,
  };

  const uniforms = {
    iTime: { value: 0, type: 'float' },
    intensity: { value: params.intensity, type: 'float' },
    colorScale: { value: params.colorScale, type: 'float' },
    baseColor: { value: new THREE.Color(params.baseColor), type: 'vec3' },
    animSpeed: { value: params.animationSpeed, type: 'float' },
    useTexture: { value: params.useTexture, type: 'bool' },
    textureMix: { value: params.textureMix, type: 'float' },
  };

  const glslProps = {
    vertexHeader: `
      varying vec2 vUv;
      varying vec3 v_position;
      void main() {
        vUv = uv;
        v_position = position;
    `,
    fragHeader: Object.keys(uniforms)
      .map((k) => `uniform ${uniforms[k].type} ${k};`)
      .join("\n") + "\nvarying vec3 v_position; varying vec2 vUv;\n",
    fragBody: `
      vec4 O = vec4(0.0);
      vec2 I = (vUv - 0.5) * 2.0;
      float i = 0.0, d, z = 0.0;
      for(O *= i; i++ < 1e2;
           O += (cos(z + vec4(0,2,3,0)) + 1.5) / d / z * colorScale)
      {
          vec3 p = z * normalize(vec3(I.x*2.0, I.y*2.0, -1.0)) + .8;
          d = max(-p.y, 0.);
          p.y += d+d - 1.;
          z += d = .3 * (.01 + .1*d + length(min(p = cos(p + iTime * animSpeed) + cos(p/.6).yzx, p.zxy)) / ++d / d);
      }
      O = tanh(O / 7e2) * intensity;
      O.rgb = mix(O.rgb, O.rgb * vec3(baseColor), 0.5);

      vec4 diffuseColor = O;
      #ifdef USE_MAP
          if(useTexture) {
              vec3 textureColor = texture2D(map, vUv).rgb;
              float luminance = dot(textureColor, vec3(0.299,0.587,0.114));
              diffuseColor = mix(diffuseColor,
                                 diffuseColor * vec4(textureColor * (1.0+luminance), opacity),
                                 textureMix);
          }
      #endif
    `,
  };

  materials.forEach((m) => {
    m.onBeforeCompile = (shader) => {
      Object.assign(shader.uniforms, uniforms);
      shader.vertexShader = shader.vertexShader.replace(
        "void main() {",
        glslProps.vertexHeader
      );
      shader.fragmentShader = shader.fragmentShader
        .replace(
          "#include <common>",
          glslProps.fragHeader + "\n#include <common>\n"
        )
        .replace(
          "vec4 diffuseColor = vec4( diffuse, opacity );",
          glslProps.fragBody
        );
      m.needsUpdate = true;
    };
  });

  setupGUI(params, uniforms);

  model.render = (t) => (uniforms.iTime.value = t);
}
2. GUI设置
JAVASCRIPT
1
2
3
4
5
6
7
8
9
10
11
12
13
14
function setupGUI(p, u) {
  const gui = new GUI();
  gui.width = 300;
  const fx = gui.addFolder("着色器效果");
  fx.add(p, "intensity", 0.1, 3).onChange((v) => (u.intensity.value = v));
  fx.add(p, "colorScale", 0.5, 3).onChange((v) => (u.colorScale.value = v));
  fx.add(p, "animationSpeed", 0.1, 2).onChange((v) => (u.animSpeed.value = v));
  fx.addColor(p, "baseColor").onChange((v) => u.baseColor.value.set(v));
  const tex = gui.addFolder("纹理控制");
  tex.add(p, "useTexture").onChange((v) => (u.useTexture.value = v));
  tex.add(p, "textureMix", 0, 1).onChange((v) => (u.textureMix.value = v));
  fx.open();
  tex.open();
}
3. 星空背景
JAVASCRIPT
1
2
3
4
5
6
7
8
9
10
11
12
13
const starGeo = new THREE.BufferGeometry();
const starCount = 6000;
const starPos = [];
for(let i=0;i<starCount;i++){
  starPos.push(
    THREE.MathUtils.randFloatSpread(4000),
    THREE.MathUtils.randFloatSpread(4000),
    THREE.MathUtils.randFloatSpread(4000)
  );
}
starGeo.setAttribute('position', new THREE.Float32BufferAttribute(starPos, 3));
const starMat = new THREE.PointsMaterial({color:0x00ffff, size:1.2, transparent:true, opacity:.6});
scene.add(new THREE.Points(starGeo, starMat));
4. 渲染循环
JAVASCRIPT
1
2
3
4
5
6
7
function animate(){
  requestAnimationFrame(animate);
  controls.update();
  const time = performance.now() * 0.001;
  cityModel && cityModel.render?.(time);
  renderer.render(scene, camera);
}
调试技巧
- 强度调整:修改intensity参数控制整体效果强度
- 颜色缩放:调整colorScale参数改变颜色对比度
- 动画速度:修改animationSpeed参数改变动态效果速度
- 基础颜色:使用baseColor选择偏好的主色调
- 纹理混合:调整textureMix参数控制纹理混合程度
扩展思路
- 多城市切换:支持加载不同城市模型
- 音频响应:根据音频频率调整着色器参数
- 交互控制:添加鼠标交互影响着色器效果
- 日夜模式:实现白天和夜晚不同的着色器效果
- 多视角切换:添加不同角度的相机预设
- 导出功能:支持导出当前效果为图片或视频

💬 评论区
评论功能即将上线,敬请期待!