

Three.js 爱心粒子世界 | 三维可视化 / AI 提示词
📋 AI 提示词
prompt
1
2
3
4
5
6
7
8
9
10
11
12
13
14
15
16
17
18
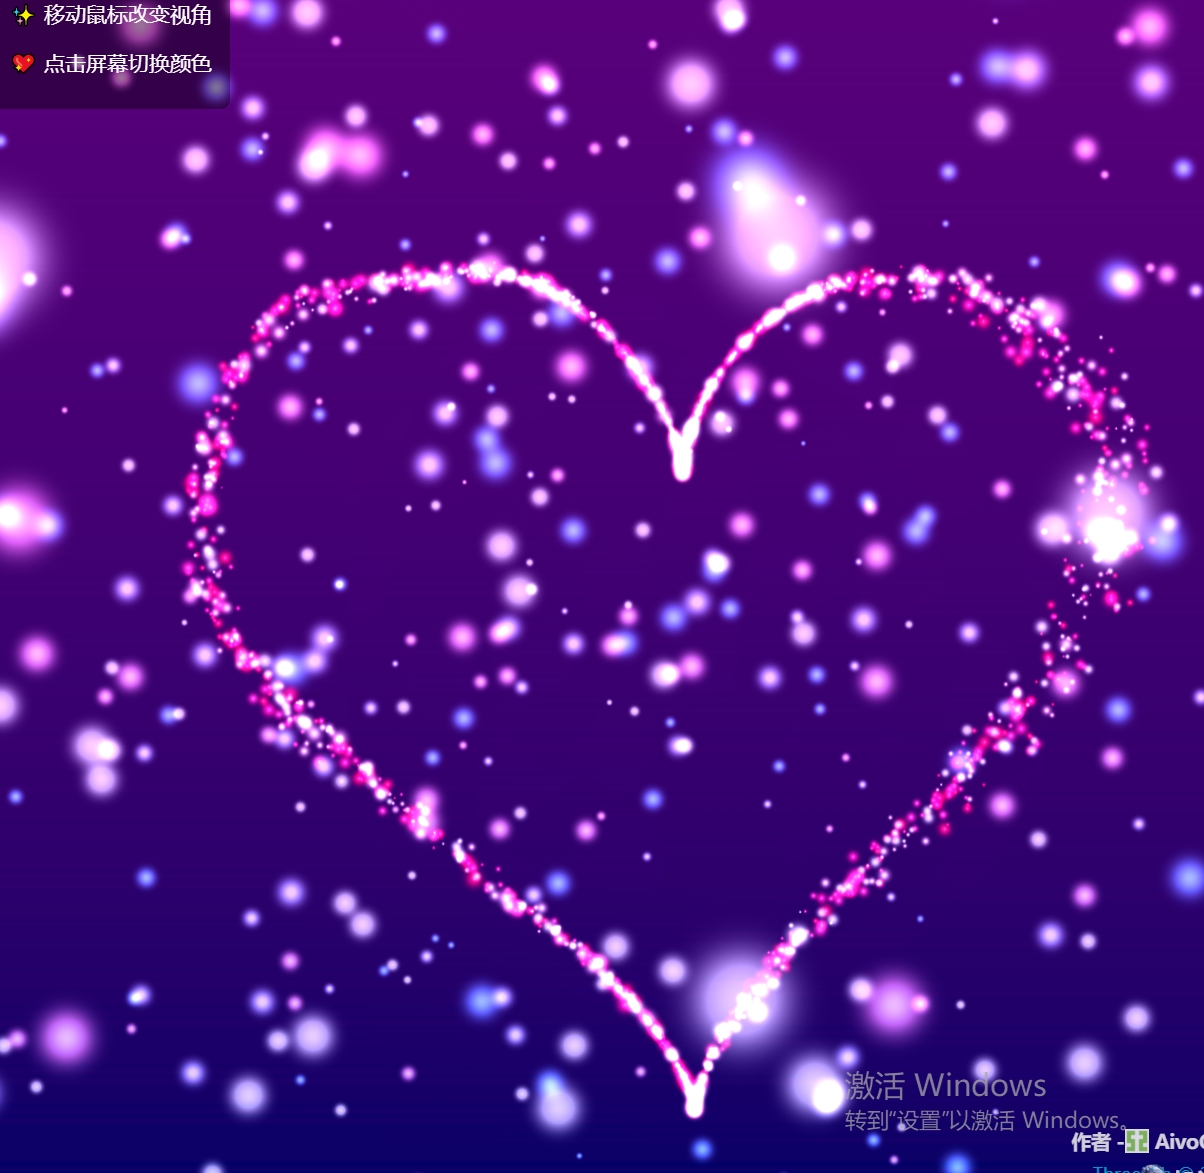
使用 Three.js 实现【爱心粒子动画效果】,具体要求:

【核心特效】
- 大量心形粒子组成的3D爱心形状
- 粒子脉动效果和浮动动画
- 多种颜色主题切换

【场景与光照】
- 渐变背景从深紫到深蓝
- 环境光和点光源组合
- 动态光晕效果

【交互与控制】
- 鼠标移动控制相机和光源位置
- 点击切换颜色主题
- 平滑过渡动画

【技术要求】
- Three.js 版本
- GSAP 动画库
- 实例化渲染(InstancedBufferGeometry)
- 自定义着色器材质
🖼️ 效果预览
🎮 案例演示
📖 效果拆解
| 层次 | 视觉效果 | 技术实现 |
|---|---|---|
| 基础 | 渐变背景纹理 | Canvas 动态生成 |
| 核心特效 | 心形粒子云 | 实例化渲染 + 心形参数方程 |
| 增强细节 | 星星粒子背景 | PointCloud + 闪烁效果 |
| 氛围营造 | 动态光晕 | ShaderMaterial + 噪声扰动 |
🔧 核心技术点
1. 心形参数方程
在顶点着色器中实现心形曲线:
glsl
1
2
3
4
5
6
7
8
9
10
11
12
13
14
vec3 heartShape(float t, float scale) {
    t = aPhase + sin(uTime * 0.2) * 0.05;
    float sign = 2.0 * (step(0.5, aOffset) - 0.5);
    t = sign * mod(-uTime * aSpeed * 0.004 + 9.0 * aSpeed * aSpeed, PI);

    float r = 0.16 * scale;
    // 经典心形参数方程
    float x = r * 16.0 * pow(sin(t), 2.0) * sin(t);
    float y = r * (13.0 * cos(t) - 5.0 * cos(2.0 * t) - 2.0 * cos(3.0 * t) - cos(4.0 * t));
    float z = 0.13 * a * (aOffset - 0.5) * sin(12.0 * sin(0.3 * uTime + aOffset * 3.0) * t);

    // 添加浮动动画
    y += sin(uTime * 0.5) * 0.06;
    x += cos(uTime * 0.3) * 0.04;

    return vec3(x, y, z);
}
2. 实例化渲染优化
使用 InstancedBufferGeometry 实现高效渲染:
javascript
1
2
3
4
5
6
7
8
9
10
11
12
13
14
const count = this.params.heartParticles; // 1800个粒子
const instancedGeometry = new THREE.InstancedBufferGeometry();

// 创建实例化属性
const scales = new Float32Array(count);
const colors = new Float32Array(count * 3);
const speeds = new Float32Array(count);
const offsets = new Float32Array(count);
const phases = new Float32Array(count);

// 设置实例化属性
instancedGeometry.setAttribute("aScale", new THREE.InstancedBufferAttribute(scales, 1));
instancedGeometry.setAttribute("aColor", new THREE.InstancedBufferAttribute(colors, 3));
instancedGeometry.setAttribute("aSpeed", new THREE.InstancedBufferAttribute(speeds, 1));
instancedGeometry.setAttribute("aOffset", new THREE.InstancedBufferAttribute(offsets, 1));
instancedGeometry.setAttribute("aPhase", new THREE.InstancedBufferAttribute(phases, 1));
3. 发光效果实现
在片元着色器中添加发光和透明度:
glsl
1
2
3
4
5
6
7
8
9
10
void main() {
    // 计算发光强度
    float strength = 1.0 - 2.0 * distance(vUv, vec2(0.5));
    strength = pow(strength, 1.4);

    // 增强发光和颜色饱和度
    vec3 finalColor = vColor * (1.0 + vIntensity * 0.8);

    // 添加白色光晕
    finalColor += vec3(1.0) * pow(strength, 6.0) * 0.4;

    gl_FragColor = vec4(finalColor * strength, strength);
}
💡 调试与优化
| 问题类型 | 表现形式 | 解决方案 |
|---|---|---|
| 性能问题 | 大量粒子导致帧率下降 | 使用实例化渲染,减少 draw call |
| 着色器报错 | 心形方程计算出错 | 检查 GLSL 语法,验证参数范围 |
| 颜色更新卡顿 | 颜色切换不流畅 | 使用 GSAP 平滑过渡,避免直接赋值 |
| 粒子闪烁 | 透明度混合问题 | 调整 blending 模式和 depthWrite 设置 |
🚀 扩展思路
| 变体效果 | 核心改动 | 难度 |
|---|---|---|
| 粒子拖尾 | 添加 trail 效果或使用自定义着色器 | ⭐⭐ |
| 粒子碰撞 | 添加物理模拟,实现粒子间碰撞检测 | ⭐⭐⭐ |
| 文字形状 | 修改参数方程,将心形改为文字轮廓 | ⭐⭐⭐ |
| 移动端适配 | 优化粒子数量和着色器复杂度 | ⭐⭐ |
本文档由 ThreeLab 编辑整理,如需转载,请注明出处。
 京公网安备 11010502038735号
💬 评论区
评论功能即将上线,敬请期待!